How To Upload And Manage Images
Log in to Your WordPress Dashboard
Begin by logging in to your WordPress account and accessing the dashboard. This is the central hub where you can manage various aspects of your website, including image uploads.
Navigate to the Media Library
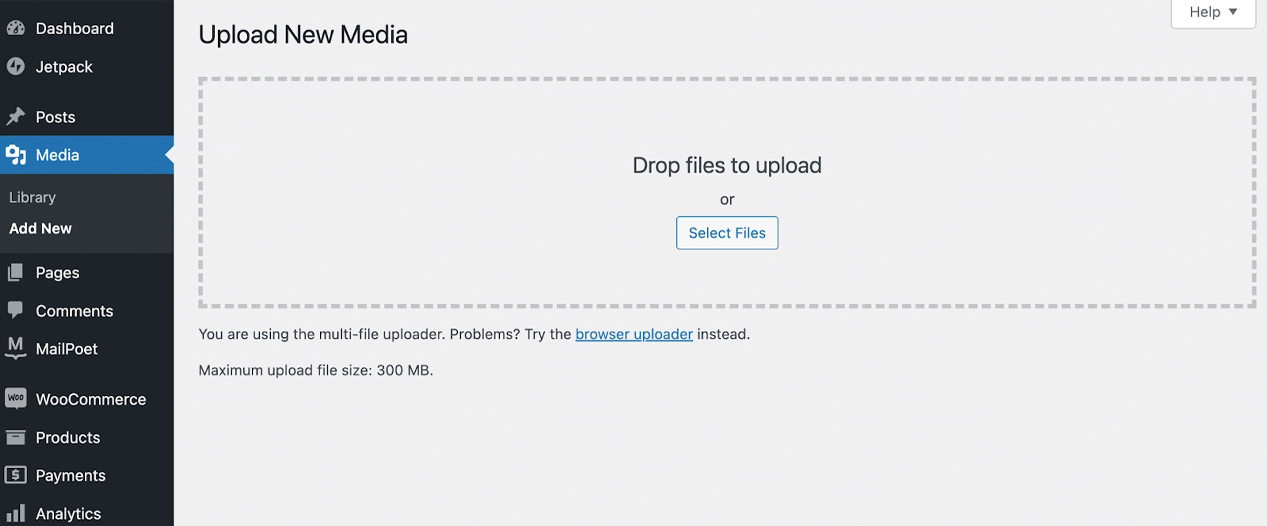
On the left-hand menu, find and click on the “Media” tab. This will take you to the Media Library, where all your uploaded images and other media files are stored. Here, you can organize, edit, and add new images to your collection.
Uploading Images
To upload new images, click on the “Add New” button at the top of the Media Library page. You can then either drag and drop your image files into the designated area or click the “Select Files” button to choose files from your computer. WordPress supports various image formats, including JPEG, PNG, GIF, and more.

Add Image Details
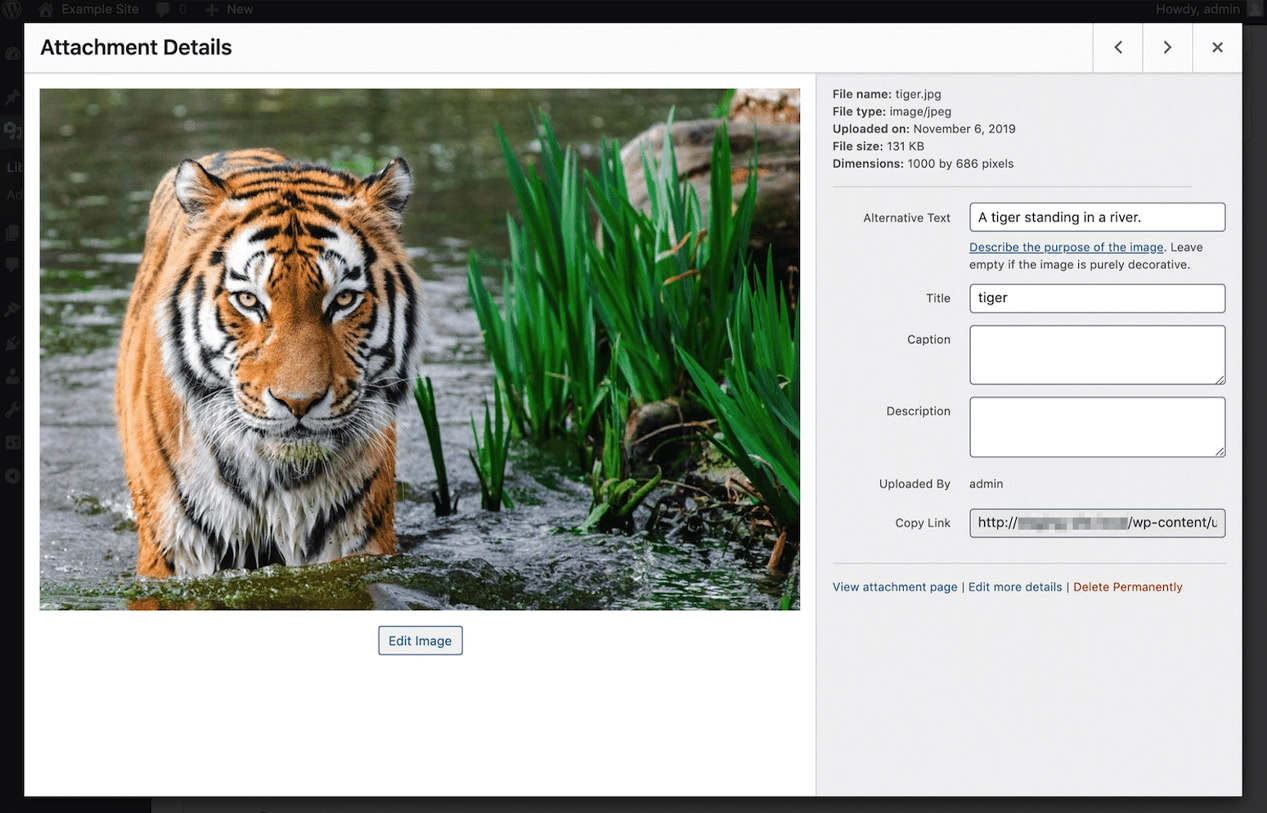
Once the images are uploaded, you can add important details for each file. This includes the title, caption, alt text, and description. Adding descriptive information not only enhances accessibility for users with disabilities but also improves search engine optimization (SEO).
- Title: Give your image a descriptive title.
- Caption: Add a brief caption to provide context for the image.
- Alt Text: Write a concise alternative text that describes the content of the image.
- Description: Provide additional details or context about the image.

Image Editing and Cropping
If you need to make adjustments to your images, WordPress provides basic editing tools. Click on the “Edit Image” button to access options such as cropping, rotating, and scaling. This is particularly useful for fine-tuning images to fit your website’s design.
Organizing Images in the Media Library
To keep your Media Library organized, consider creating folders or categories. While WordPress doesn’t have native support for folders, you can use tags or categories to group related images. This makes it easier to locate specific images when you need them.
Conclusion
Mastering the art of uploading and managing images on your WordPress account is a fundamental skill for anyone looking to create a visually appealing website. By following these steps, you can seamlessly integrate images into your content, enhance your website’s visual appeal, and provide a more engaging experience for your audience. Regularly organizing and optimizing your images will contribute to the overall success of your WordPress-powered website.